I used to astonish all the time when I see the FTP package name. vsftpd which abrivated to Very Secure File Transfer Demon(vsftpd). But when we see the security prospective of this package there is no much security included with this package. I mean when you login to server the credentials are transfered in plain text. So by defalut root user is not allowed to login to ftp server.
To eliminate transfering data in plain text and to encrypt the entire transmission we can take help from open ssl to generate a certificate and use SSL certificate when communicating with FTP server. This is nothing but a FTPS server.
Some file transfers you should know are.
1. TFTP(Trivial File Transfer Protocol which uses UDP for transmission) –high data rates/not secure
2. (This protocol uses SSH in backend, so you no need to run an FTP server) –secure
3. FTP(This is normal ftp transfer which uses TCP) –not secure
4. FTPS(FTP+SSL certificate to encrypt data transmission)
5. Over SSH(this is a kind of ftp tunnel on SSH protocol)
In this post we will see how you can configure SSL certificate for VSFTPD.
Step1 : Check the following packages on the server and if they are not install please install them.
#yum install openssl
#yum install vsftpd
Step2 : Generate rsa key in /etc/vsftpd folder as below.
#cd /etc/vsftpd
#/usr/bin/openssl req -x509 -nodes -days 365 -newkey rsa:1024 -keyout vsftpd.pem -out vsftpd.pem
The clipped output for your reference
[root@v-itig42 vsftpd]# /usr/bin/openssl req -x509 -nodes -days 365 -newkey rsa:1024 -keyout vsftpd.pem -out vsftpd.pem
Generating a 1024 bit RSA private key
....................................................++++++
..........................................++++++
writing new private key to 'vsftpd.pem'
-----
You are about to be asked to enter information that will be incorporated.
into your certificate request.
What you are about to enter is what is called a Distinguished Name or a DN.
There are quite a few fields but you can leave some blank.
For some fields there will be a default value,
If you enter '.', the field will be left blank.
-----
Country Name (2 letter code) [GB]:IN
State or Province Name (full name) [Berkshire]:Andhra Pradesh
Locality Name (eg, city) [Newbury]:Vijaywada
Organization Name (eg, company) [My Company Ltd]:Linuxnix Systems Limited
Organizational Unit Name (eg, section) []: IT admin Group
Common Name (eg, your name or your server's hostname) []:ftp2.linuxnix.co.in
Email Address []:surendra@linuxnix.co.in
Step3 : Once the Certificate is generated, certificate is kept in /etc/vsftpd folder. We have to provide this entry in vsftpd.conf along some ssl configurations.
Step4 : Edit vsftpd.conf and give enteris at the last of the file.
#vi /etc/vsftpd/vsftpd.conf
#For SSL on specify yes to below option.
ssl_enable=YES
# To allow anonysonomous users to use SSL
allow_anon_ssl=YES
# if you want local users to use both ssl as well unsecure way of transmission of data plz specify no to below option.
force_local_data_ssl=NO
#If you want to allow all the login credentials which are transmitted should be sent with encryption #pleas use below option to force them to use only ssl connection at the time of login.
force_local_logins_ssl=YES
# Permit TLS v1 protocol connections. TLS v1 connections are preferred
ssl_tlsv1=YES
# Permit SSL v2 protocol connections. TLS v1 connections are preferred
ssl_sslv2=NO
# permit SSL v3 protocol connections. TLS v1 connections are preferred
ssl_sslv3=NO
#Please pecifies the location of the RSA certificate to use for SSL encrypted connections
, which we #created some time back.
rsa_cert_file=/etc/vsftpd/vsftpd.pem
Now save and exit the vsftpd file
Step5 : Restart the vsftpd service.
# service vsftpd restart
Shutting down vsftpd: [ OK ]
Starting vsftpd for vsftpd: [ OK ]
Start accessing the ftp server with user name credentials with filezila or some other FTP clients which will support SSL/TSL. If you want to access ftps sites through browsers its not possible. We have to have addon called fireftp. Then only we can access ftps:// site. Here in this example I used filezila.
How To : FTPS Server Configuration
0 comments 2/21/2010 04:36:00 AM Posted by Meghana M BhombhoreLabels: File Share Servers, How-To's, Security
Converting Sun Virtualbox vmi file To Vmware vmdk file
2 comments 2/21/2010 03:45:00 AM Posted by Surendra Kumar AnneLabels: How-To's, Virtualization
This article show you how to convert Sun Virtualbox vmi file to Vmware vmdk file. Recently I have started using Ubuntu as my desktop in my company. And installed Sun Virtualbox for test VMs. But most of the people have vmplayer installed. So they donot know how to use this vmi images on a windows box. So here is a solution for converting those vdi image files to VMware .vmdk images.
When we install Sun Virtualbox we have so many command lines tools installed along with it. One good tool is VBoxManage, Please remember commands in Linux are case sensitive. So if you try to type vboxmange it will not work. You have to type exactly as VBoxManage.
Step1 : Convert from vdi to raw.
#VBoxManage internalcommands converttoraw /data/Vm-images/ubuntu-vm.vdi /data/Vm-images/ubuntu.raw
Step2 : Now install qemu, which is used to convert .raw files to .vmdk
#apt-get install qemu
Step3 : Convert .raw files to .vdmk using qemu-img command
#qemu-img convert -O vmdk /data/Vm-images/ubuntu.raw /data/Vm-images/ubuntu.vmdknow try to access this .vmdk file using your VMware workstation or VMware player.
So what about viseversa?here there are two methods are there
1. By default your Sun Virtualbox will support .vmdk vmware images.
2. If its not supported use the following way.
Step1 : Use again qemu-img to convert .vmdk disk to .rawqemu-img convert ubuntu.vmdk /tmp/ubuntu.raw
Step2 : VBoxManage convertdd /tmp/ubuntu.raw ubuntu.vdiplease share your thoughts.
File Types In Linux
0 comments 2/15/2010 03:22:00 PM Posted by Meghana M BhombhoreLabels: Basics, File System, Tutorials
"How many types of files are there and what are they?" This is a common question to every person who started learing Linux.
Why is this so much important to know file types?
Ans : This is because Linux will consider every thing as files. The Answer to this question is little bit confusing with different answers.
Let me put it in this way to clarify. By default Unix have only 3 types of files..
They are.
1. Regular files
2. Directory files
3. Special files(This is the file type who is the culprit for different answers. This catagory is having 5 sub types.)
So Total file types in Linux are 7. Remeber I am saying in linux there are only 7 types of files but if it comes to unix it is 8 types.
Here are those files. And you can see the file type indication at leftmost part of “ls -l” command
1. Regular file(-)
2. Directory files(d)
Special files
3. Block file(b)
4. Character device file(c)
5. Named pipe file or just a pipe file(p)
6. Symbolic link file(l)
7. Socket file(s)
For your information there is one more file called door files(D) which is present in Sun Solaris. A door is a special file for inter-process communication between a client and server(so total 8 types in Unix machines.).
Regular files : These are the files are indicated with "-" in ls -l output. And these files are.1. Readable files or
2. A binary files or
3. Image files or
4. Compressed files etc.
How to create them?
Ans : Use touch command.
Example listing of regular files :-rw-r--r-- 1 krishna krishna 20986522 2010-01-31 13:48 test.wmv
-rw-r--r-- 1 krishna krishna 173448 2010-01-30 21:20 Transformers-Teaser-Wallpaper-310.jpg
-r-xr-xr-x 1 root root 135168 2009-12-12 19:14 VIDEO_TS.VOB
-rw-r--r-- 1 krishna krishna 2113536 2009-12-01 13:32 Aditya 365 – Janavule.mp3
-rwxrwxrwx 1 root root 168 2010-02-14 14:12 xyz.sh
Directory files : These contains the name and location of files/folders/special files stored on a physical device. And this type of files will be in blue in color.
How to create them?
Ans : Use mkdir command
Example listing of directories.drwxr-xr-x 2 surendra surendra 4096 2010-01-19 18:37 bin
drwxr-xr-x 5 surendra surendra 4096 2010-02-15 18:46 Desktop
drwxr-xr-x 2 surendra surendra 4096 2010-01-18 14:36 Documents
drwxr-xr-x 2 surendra surendra 4096 2010-02-13 17:45 Downloads
Block files : These files are hardware files most are present in /dev
How to create them?
Ans : Use fdisk command or create virtual partition.
Example listing of Block files(for you to see these file, they are located in /dev).
brw-rw---- 1 root disk 8, 1 2010-02-15 09:35 sda1
brw-rw---- 1 root disk 8, 2 2010-02-15 09:35 sda2
brw-rw---- 1 root disk 8, 5 2010-02-15 09:35 sda5
Character devices files : Provide only a serial stream of input or output.
Example listing of character files(located in /dev)
crw-rw-rw- 1 root tty 5, 0 2010-02-15 16:52 tty
crw--w---- 1 root root 4, 0 2010-02-15 09:35 tty0
crw------- 1 root root 4, 1 2010-02-15 09:35 tty1
Pipe files : The other sort of pipe is a “named” pipe, which is sometimes called a FIFO. FIFO stands for “First In, First Out” and refers to the property that the order of bytes going in is the same coming out. The “name” of a named pipe is actually a file name within the file system. --www.linux.com
How to create them?Ans : Use mkfifo command.
Example listing of pipe files
prw-r----- 1 root root 0 2010-02-15 09:35 /dev/.initramfs/usplash_outfifo
prw-r----- 1 root root 0 2010-02-15 09:35 /dev/.initramfs/usplash_fifo
prw------- 1 syslog syslog 0 2010-02-15 15:38 /var/run/rsyslog/kmsg
Sybolic link files : These are linked files to other files.
How to create them?
Ans : use ln command
Example listing of linked files
lrwxrwxrwx 1 root root 24 2010-02-15 09:35 sndstat -> /proc/asound/oss/sndstat
lrwxrwxrwx 1 root root 15 2010-02-15 09:35 stderr -> /proc/self/fd/2
lrwxrwxrwx 1 root root 15 2010-02-15 09:35 stdin -> /proc/self/fd/0
lrwxrwxrwx 1 root root 15 2010-02-15 09:35 stdout -> /proc/self/fd/1
Socket files : A socket file is used to pass information between applications for communication purpose
How to create them?
Ans : You can create a socket file using socket() system call avialable under
Example
int sockfd = socket(AF_INET, SOCK_STREAM, 0);
You can refer to this socket file using the sockfd. This is same as the file descriptor, and you can use read(), write() system calls to read and write from the socket.
Example listing of socket files.
srw-rw-rw- 1 root root 0 2010-02-15 09:35 /dev/log
srwxrwxrwx 1 root root 0 2010-02-15 10:07 /var/run/cups/cups.sock
srwxrwxrwx 1 root root 0 2010-02-15 09:35 /var/run/samba/winbindd_privileged/pipe
srwxrwxrwx 1 mysql mysql 0 2010-02-15 09:35 /var/run/mysqld/mysqld.sock
A tip for you guys.
How to find your desired type of a file ?Ans : Use find command with -type option.
For example if you want to find socket file, just use below command.find / -type sIf you want to find linked file then how?Find / -type l
Thats it.. You got it.. :) Enjoy reading..
How to : Confiugre Pidgin To Connect Microsoft OCS/LCS IM Server
2 comments 2/14/2010 10:25:00 PM Posted by Meghana M BhombhoreLabels: Applications, Desktop, Hacks, Pidgin
Note:I am seeing so many people visiting this page, but leaving early.. please feel free to comment at comment section what problems you faced in installing PIDGIN, i am very much interested in helping you..
Good news for all the Linux lovers who are working in Corporate companies where most of the communication is through Microsoft OCS(Office Communicator Software)/IBM Same time IM clients. OCS is primarily used for IM communications, but if you want to use OCS in Linux its not possible till this point. Recently Pidgin started supporting SIP(Session Initiation Protocol) Protocol. So for the people how know about MS OCS. Here is the short notes for you.
MS OCS is a properitery software is an enterprise real-time communications server, providing the infrastructure for enterprise instant messaging, presence, file transfer, Peer to peer and multiparty voice and video calling, ad hoc and structured conferences (audio, video and web) and PSTN connectivity. These features are available within an organization, between organizations, and with external users on the public internet, or standard phones, on the PSTN as well as SIP trunking.
Its little bit tricky to install and use it. Here are the steps how to accomplish this.
Note : By default Pidgin will not support MS OCS. We require a third party (pidgin-sipe) to accesses MS OCS.
Step1 : Check if pidgin is installed or not, From Ubuntu9.10 pidgin is removed as default IM client. So you have to install it.
Installation in Ubuntu :
#apt-get install pidgin
Installing in Redhat/Fedora/CentOS :
#yum install pidgin
Step2 : Install Pidgin-sipe plugin
Installation in Ubuntu :
#apt-get install pidgin-sipe
Installation in Redhat/Fedora/CentOS :
I am not sure if its included in Fedora/Redhat/CentOS repos. If you get error in installing through YUM, install it through source package.
#yum install pidgin-sipe
or
Download source from Soruceforge here.
#mkdir ~/temp
#cd ~/temp
#wget http://sourceforge.net/projects/sipe/files/sipe/pidgin-sipe-1.8.0/pidgin-sipe-1.8.0.tar.gz/download
#tar xvfz pidgin-sipe-1.8.0.tar.gz#cd pidgin-sipe
#./configure;make;make install
Step3 : Most of the time when you install software/packages in Linux you no need to restart the mechine. But this addon/plugin to work you have to restart your machine(its my observation, if its works without restart its good).
Step4 : Configuring Pidgin to support OCS.
Go to Applications
__Internet
__Pidgin instant messanger
__Accounts
__Manage Accounts
__Add
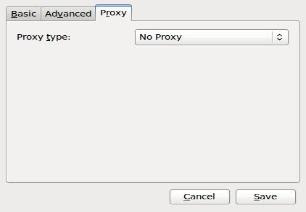
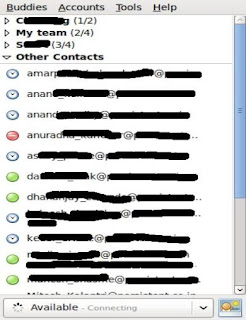
Enjoy using MS OCS in linux.
How To : Linux Terminal Server Project (LTSP)
0 comments 2/13/2010 11:44:00 PM Posted by Meghana M BhombhoreLabels: Guest Post, How-To's, Thin client
Guest post by Sandeep Yadav(http://linuxarea.webs.com/). He is having 2+ years of experience in Linux administration and he is a good at automating system admin task through shell scripting. You can reach him at sandeeprhce5@gmail.com.
Now I will tell you how we can configure LTSP server for our lab with telnet, rdesktop, shell and startx ( for Linux log in).
Step1 :
a. Make sure DHCP server is installed and running properly on your system
b. Now install tftp server also on your machine and you can find it’s rpm on your Redhat DVD (5.0)
c. Now install rdesktop rpm and it is also you can find on your redhat DVD (5.0)
d. Configure your windows xp system with full terminal and remote desktop support for distribute rdesktop also over the network so that client can be run windows xp.
e. Now download ltsp-4.1.0-1_2.iso image from it’s website (http://ltsp.mirrors.tds.net/pub/ltsp/isos/) and my package size is 100MB (apprx.).
f. Now I am making dir test in filesystem (/) and extract this package in test directory
g. Now open readme file from test folder and read instructions carefully on how to install this package.
h. After installation complete you need to configure ltsp server .
Step 2 :
Configure tftp for ltsp server
TFTP : TFTP is a simple file transfer protocol, used by ltsp to transfer the kernel to the workstations.
XINETD : Xinetd is a powerful replacement for inetd, with advanced features, used by ltsp to start tftp.
Open the file # vim /etc/xinetd.d/tftp and make disable = no. Otherwise tftp not work.
service tftp
{
Disable = no
socket_type = dgram
protocol = udp
wait = yes
user = root
server = /usr/sbin/in.tftpd
server_args = -s /var/lib/tftpboot
per_source = 11
cps = 100 2
flags = IPv4
}
Now restart xined service
#service xinetd restart
Step3 :
Configure nfs for ltsp server
Open the file #vim /etc/exports and enter following lines in it.
/opt/ltsp 192.168.0.0/255.255.255.0(ro,no_root_squash,sync)
/var/opt/ltsp/swapfiles 192.168.0.0/255.255.255.0(rw,no_root_squash,async)
Now restart nfs service
#service nfs restart
#chkconfig nfs on (for service start automatically on every bootup)
Step4 :
Configure dhcpd.conf for ltsp server
Now you need to configure dhcpd.conf file and here is example of my file.
#vim /etc/dhcpd.conf
ddns-update-style interim;
ignore client-updates;
subnet 192.168.0.0 netmask 255.255.255.0 {
# --- default gateway
# option routers 192.168.0.1;
# option subnet-mask 255.255.255.0;
# option nis-domain "domain.org";
option domain-name "san.com";
option domain-name-servers 192.168.0.1;
option time-offset -18000; # Eastern Standard Time
# option ntp-servers 192.168.1.1;
# option netbios-name-servers 192.168.1.1;
# --- Selects point-to-point node (default is hybrid). Don't change this unless
# -- you understand Netbios very well
# option netbios-node-type 2;
option log-servers 192.168.0.1;
option root-path "192.168.0.1:/opt/ltsp/i386";
If you use thes lines here then every system on your network can boot from #ltsp server but if you want more security then remove this line and then only #that system can boot that’s hardware address will declare in “host ws001” #section with static ip address.
filename "/lts/2.4.26-ltsp-2/pxelinux.0";
range dynamic-bootp 192.168.0.128 192.168.0.254;
default-lease-time 21600;
max-lease-time 43200;
If you want to use static IP address for your workstation the following section and modify to suit your network. Then, duplicate this section for each workstation that needs a static IP address.
host ws001 {
hardware ethernet 00:20:ED:75:9A:EC;
fixed-address 192.168.0.2;
filename "/lts/2.4.26-ltsp-2/pxelinux.0";
}
}
Step5 :
Configure lts.conf for ltsp server
Now you need to configure #vim /opt/ltsp/i386/etc/lts.conf file for client.
Here is example of my lts.conf file
[Default]
SERVER = 192.168.0.1
RDP_SERVER = 192.168.0.50
XSERVER = auto
X_MOUSE_PROTOCOL = "PS/2"
X_MOUSE_DEVICE = "/dev/psaux"
X_MOUSE_RESOLUTION = 400
X_MOUSE_BUTTONS = 3
USE_XFS = N
X_COLOR_DEPTH = 24 # it is for xp terminal server
X_MODE_0 = 1024x768
RUNLEVEL = 5
LDM_REMOTECMD = /etc/X11/xinit/Xsession
SCREEN_01 = startx
SCREEN_02 = telnet
SCREEN_3 = shell
SCREEN_4 = rdesktop
Note : Here I will explain some options of this file.
SERVER : Here you I have to enter your ltsp server ip address.
RDP_SERVER : If you want to run remote desktop connection on xp then you have enter IP address. Of your xp terminal server. Otherwaise remove this option.
LDM_REMOTECMD :/etc/X11/xinit/Xsession
When I was trying to running startx on client machine it was showing white screen only for solving this problem I copied this. Option from internet and paste it here and my problem solved.
Source : The LTSP client screen will still not display because LTSP expects a file /etc/X11/Xsession to exist on the server. In RHEL5 this corresponds to /etc/X11/xinit/Xsession .This can be fixed by specifying the environment variable LDM_REMOTECMD in /opt/ltsp/i386/etc/lts.conf:[192.168.250.20]LDM_REMOTECMD = /etc/X11/xinit/Xsession.
About SCREEN :
The most interesting parameter here is SCREEN_01. The default is startx, which specifies that the workstation should boot up in a graphical X display, but there are a number of interesting possibilities.
The other options are :
· telnet : When the workstation boots up in this mode, it waits for you to press, then starts a TELNET session to the host. Obviously, your TELNET server must be running for this. (Many offices use SSH by default.). You have to enter your telnet server IP in /opt/ltsp/i386/etc/screen.d/telnet file.
· shell : This starts a local command shell, meaning local to the workstation, not to the server. From here, you could telnet or ssh to your server, or start a graphical login by typing startx. This mode is generally used for testing. It's also a great way to see the virtual Linux machine that gets created as part of the LTSP boot process.
· rdesktop : Setting SCREEN_01 to this fires up rdesktop, a Linux-based Windows Terminal Server Client, which means it uses RDP (remote desktop protocol) to communicate with and run remote Windows sessions from your Linux thin client.
How Many Screen's ?
Ans : Of course, the fact that this last variable is labeled SCREEN_01 leads up to the obvious Question: What about SCREEN_02? Or SCREEN_03?
Earlier in this chapter, I told you about running your main X session on virtual terminal session 7, while the second X session (started with an X -query) ran on virtual terminal 8. You can do something similar with thin-client workstations by modifying the lts.conf file to include more than one SCREEN definition. Here is the example from my own Server :
SCREEN_01 = startx.
You want to enter your telnet server IP in /opt/ltsp/i386/etc/screen.d/telnet file
SCREEN_02 = telnet
SCREEN_03 = shell
SCREEN_04 = rdesktop
The first virtual terminal (accessible by pressing ) runs the graphical login served up via XDMCP. The second virtual terminal () runs a TELNET session with a prompt saying “Screen:2 – Press to establish a connection to the server…” Finally, the third screen () sits at a shell prompt.
In a default LTSP installation, all these screen definitions can be found in the /opt/ltsp/i386/etc/screen.d directory. Each is a shell script and easy to read and understand. You could, if you so wish, create your own screen definitions to better suit your own environment.
These types of screen modifications can be done globally or on a client-by-client basis. In the next chapter, you are going to look at just what sorts of things you can do with workstations. I am also going to show you how you can run a not quite so thin, Linux thin client from a Windows desktop.
Step6 :
Configure xdm-config file for ltsp server
Next, open the file /etc/X11/xdm/xdm-config and comment out the line :
DisplayManager.requestPort: 0
And Edit This file also because sometime it makes problem
/opt/ltsp/i386/etc/xdm/xdm-config and comment out the line :
DisplayManager.requestPort: 0
Step7 :
Enable Remote Login in RedHat so that client able access login screen.
[root@racdb2 ~]# gdmsetup
After starting the gdmsetup utility, click the Remote tab. Under the Remote tab, change the Style pull-down menu selection from 'Remote login disabled' to 'Same as Local' :
After configuring remote access to the GDM login manager, select the Security tab. Under the Security tab,
I have checked the options:
· Allow local system administrator login
· Allow remote system administrator login
Exit from the gdmsetup utility and restart the GDM service :
[root@racdb2 ~]# /usr/sbin/gdm-restart
OR
Enable remote login via configure files.
Use the following steps to enable the services and modify the files necessary to configure the XDMCP:
1. To do this, edit the /etc/X11/xdm/Xaccess file and open the connection to hosts by un-commenting the line:
#* #any host can get a login window
or
Enter individual IP addresses of selected hosts.
SuSE users can do the same by editing the file /usr/X11R6/lib/X11/xdm/Xaccess.
2. Next, open the file /etc/X11/xdm/xdm-config and comment out the line:
DisplayManager.requestPort: 0
And this file also because sometime it makes problem
/opt/ltsp/i386/etc/xdm/xdm-config
3. Make sure to run the program xdm as the "root" user account.
# xdm &
4. If the things still do not work, you may need to reboot the server or restart the xdm if it was already running. The xdm command (X Display Manager) manages a collection of X displays, which may be on the local host or remote servers. The design of the xdm command was guided by the needs of X terminals as well as the X Consortium standard XDMCP (the X Display Manager Control Protocol).
GDM Login Manager
Users running Red Hat Enterprise Linux 5, CentOS 5, or Oracle Enterprise Linux Release 5 will need to use the GDM login manager as XDM is no longer supported.
First, edit the file /etc/gdm/custom.conf and add the following two entries:
[xdmcp]
Enable=true
[security]
DisallowTCP=false
AllowRemoteRoot=true
Next, restart X Windows:
[root@racdb2 ~]# init 3
[root@racdb2 ~]# init 5
Step8 :
It is an optional step because some time client show syslog error after booting it means your server is not configure for accept remote logs so you want to configure some lines for that-
#vim /etc/sysconfig/syslog
and add the -r option as below:
SYSLOGD_OPTIONS=”-r –m 0”
Now restart syslog service
#service syslog restart
And now open file /opt/ltsp/i386/etc/lts.conf and add the following line:
SYSLOG_HOST = 192.168.0.1 #your syslog server ip
More Examples of configure files in different way /etc/dhcpd.conf
Right Click To Open A Document
0 comments 2/08/2010 06:00:00 PM Posted by Meghana M BhombhoreLabels: Hacks
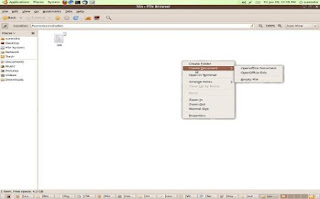
How to open a document/spreed sheet or any office document on right clicking with mouse on a desktop or in a folder in Linux(Ubuntu/Redhat)?
Ans : By default there is no option to open a document/spreed sheet on right clicking on a desktop or in a folder, This is default option in Window$. If you are core windows user and recently shifted to linux you will think why its not there in Linux. And how to get your right click option.
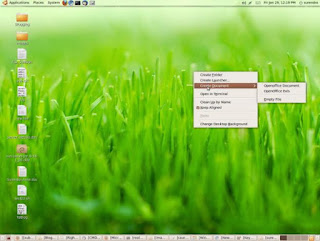
Step 1 : Check whether Templates directory in your home directory or not?
$cd
$ls
If this ls command did not show Templates folder please create one in your home directory
$ mkdir ~/Templates
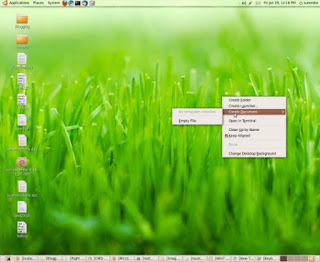
Step2 : Now open a empty office document and just save it in to the Templates directory
How To Change The Background Of A Terminal?
0 comments 2/08/2010 05:53:00 PM Posted by Meghana M BhombhoreLabels: How-To's
These days I am tweeking around Ubuntu desktop, one tweek I did today. How to change the background of a terminial?
The change really rocked my desktop look. Just have a look at my terminal after I have changed the background of it.
Ans : Just do as follows. have good image/desktop background ready to set it as a background for your terminal.
Open an terminal> Edit > Profiles>
Now press edit butten > background >background image
Then brwose your image then press close. voyala. Your terminal background is changed to your required background. Enjoy tweeking.
How To Generate Randum Password
0 comments 2/07/2010 05:18:00 AM Posted by Meghana M BhombhoreLabels: Basic-Security
Some times when creating bulk users, admins are forced to create complex passwords. But how to do it? How many you can set manually? Let me put it in this way. For one or two users we can think for a random password and assign to them. But if its 100 users? Naaa.. I cannot think for 100 passwds.
So leave this job to Linux to create random passwords.
you use below command to generate random passwords
< /dev/urandom tr -dc A-Na-n1-9_ head -c8
This will just generate random 8 lenght password
For example :
See just typing the above command will generate a random password
root@ps6061:~# < /dev/urandom tr -dc A-Na-n1-9_ head -c8
57fg67gKroot@ps6061:~# < /dev/urandom tr -dc A-Na-n1-9_ head -c8
FN8ahe8broot@ps6061:~# < /dev/urandom tr -dc A-Na-n1-9_ head -c8
eLhLLNCGroot@ps6061:~# < /dev/urandom tr -dc A-Na-n1-9_ head -c8
FK3CC9GNroot@ps6061:~# < /dev/urandom tr -dc A-Na-n1-9_ head -c8
cA8H24Mlroot@ps6061:~# < /dev/urandom tr -dc A-Na-n1-9_ head -c8
9eDL39I_root@ps6061:~#
Here is a script written by me to automate entire 20 user account creation.
#!/bin/bash
#Author:Surendra Kumar Anne
#Purpose:To automate user creation
#Date/Time:29-01-2010.19:10
mkdir -p /home/admin/useraccounts
for (( i=0; i<=20; i++ ))
do
useradd user$i
< /dev/urandom tr -dc A-Na-n1-9_ head -c8 > /tmp/passwd.txt
cat /tmp/passwd.txt passwd --stdin user$i
echo -e "Username:user$i" > /home/admin/useraccounts/user$i
echo -e "password:" >> /home/admin/useraccounts/user$i
cat /tmp/passwd.txt >> /home/admin/useraccounts/user$i
done
rm -rf /tmp/passwd.txt
Note : When password generating I have just created a password which will not contain o(small ooo), O(capital OO), 0(zero). This is to remove confusions for users. Some times user will get confusion when using these characters. If you want all the characters from a to z, A to Z, and 0-9 just use below code.
< /dev/urandom tr -dc A-Za-z0-9_ head -c8
How To Change The Default Editor In Ubuntu
0 comments 2/06/2010 08:21:00 PM Posted by Meghana M BhombhoreLabels: Ubuntu
In most of the Linux distribution the defalut editor is set to “VI” and its very much popular editor too. But the strange in Ubuntu the default editor is “nano”. But most of the people are well in using vi editor. Here in this post I am going to show how to change the default editor in ubuntu(ie nano) to vi editor
To do this we have to sudo or login as root. and execute the below command.
$sudo update-alternatives --config editor
When you execute above command it will show all the editors installed in your machine, and it ask you to set the default editor by specifying number.
There are 4 choices for the alternative editor (providing /usr/bin/editor).Selection Path Priority Status
------------------------------------------------------------
* 0 /bin/nano 40 auto mode
1 /bin/ed -100 manual mode
2 /bin/nano 40 manual mode
3 /usr/bin/vim.basic 30 manual mode
4 /usr/bin/vim.tiny 10 manual mode
Press enter to keep the current choice[*], or type selection number:
Here I want to change it to vi edioter so just enter 3 to set it as a default editor.
Here is my clipped output how I did
update-alternatives --config editor
There are 4 choices for the alternative editor (providing /usr/bin/editor).Selection Path Priority Status
------------------------------------------------------------
* 0 /bin/nano 40 auto mode
1 /bin/ed -100 manual mode
2 /bin/nano 40 manual mode
3 /usr/bin/vim.basic 30 manual mode4 /usr/bin/vim.tiny 10 manual mode
Press enter to keep the current choice[*], or type selection number: 3
update-alternatives : using /usr/bin/vim.basic to provide /usr/bin/editor (editor) in manual mode.
How To Play .ram(Real Audio Metadata) In Redhat/Ubunto
0 comments 2/02/2010 08:31:00 AM Posted by Meghana M BhombhoreLabels: Audio, Troubleshooting
The .ram (Real Audio Metadata) is an properitery audo formate from Real media network's which is having its player called Real player.
This format is a stream media format, ie media is stramed from other source.
So how to play this file in Linux?
Ans : To play this we have to install mplayer. you may get doubt that why I am saying mplayer, i dont suggest to you a properitery real plyaer which will be annoying you all sorts of ads etc. mplayer is a good open source software with which you can play almost every formate. This is my favorite player after VLC player, which is once again a open source.
These are the file formates supported by mplayer
1. Physical media : CDs, DVDs, Video CDs
2. Container formats : 3GP, AVI, ASF, FLV, Matroska, MOV (QuickTime), MP4,
NUT, Ogg, OGM, RealMedia
3. Video formats : Cinepak, DV, H.263, H.264/MPEG-4 AVC, HuffYUV, Indeo, MJPEG, MPEG-1, MPEG-2, MPEG-4 Part 2, RealVideo, Sorenson, Theora, WMV
4. Audio formats : AAC, AC3, ALAC, AMR, DTS, FLAC, Intel Music Coder, Monkey's Audio, MP3, Musepack, RealAudio, Shorten, Speex, Vorbis, WMA
5. Subtitle formats : AQTitle, ASS/SSA, CC, JACOsub, MicroDVD, MPsub, OGM, PJS, RT, Sami, SRT, SubViewer, VOBsub, VPlayer
6. Image formats: BMP, JPEG, MNG, PCX, PTX, TGA, TIFF, SGI, Sun Raster
7. Protocols : RTP, RTSP, HTTP, FTP, MMS, Netstream (mpst://), SMB –wikipedia.org
How to install mplayer in linux?
In Ubuntu Linux:
sudo apt-get install mplayer
In Redhat Linux:
yum install mplayer


